This article will go through the complete process of how to create a Web Service and then how to consume it in any ASPX page. We’ll do this entirely within the Visual Studio.NET. Our Web Service will convert Fahrenheit degrees to Celcius.
What is a Web Service?
The buzz word around IT these days is Web Services. It has actually taken many years for Web Services to evolve to what they are today. A Web Service is defined as “a component of programmable application logic that can be accessed using standard web protocols”. It’s basically a component, or an assembly in ASP.NET, that can be accessed over the web. Anyone with a browser can see and use this application logic.
Generically speaking, a Web Service has inputs and outputs: it accepts some kind of request from the client and returns some results. This is what a public search engine like Yahoo! does. Everyone is talking about XML Web Services and the term is being used synonymously with Web Services. However, a distinction has to be made here for clarity, because they are 2 different things. A search engine like Yahoo! is an HTML Web Service. This specific kind of service requires a user to actively interact with the service and interpret the results. On the other hand, an XML Web Service returns the results in an XML format and it is self-describing. It is therefore smart enough to be able to communicate between servers and perform actions based on the returned results.
The returned results are wrapped in a specification which is called Simple Object Access Protocol (SOAP). This is a W3C specification, and it is a format which describes the data that is sent over HTTP. It is flexible enough (and complicated) to allow for a Web Service to be self-describing. This is a complex matter, which I will not be covering in this article. More information on these protocols can be found at the World Wide Web Consortium site (W3C).
Starting a new Project in Visual Studio.NET
To create a new project go to File > New > Project.
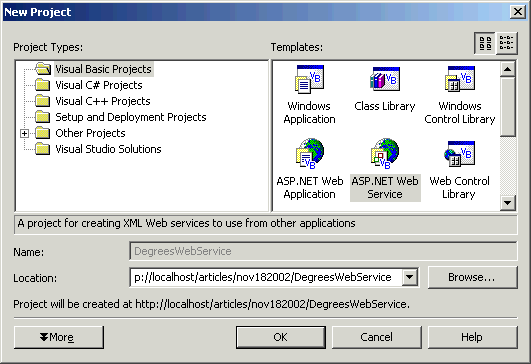
We will see the above dialog box come up. On the left, under Project types, we choose the language we want to build our solution in (Visual Basic in this case). On the right, under Templates, choose ASP.NET Web Service. At the bottom, in Location, we choose the location and the name of our project. Notice that I saved mine under the localhost, meaning that it adds this new project to the website already in place on my server.
When we click on OK, Visual Studio (VS) does 2 things:
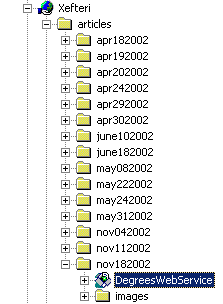
First, it creates a new virtual application in our website, under the location that we specified. In the screen capture above of the IIS, we can see that a new virtual folder was added to the location that we specified. Remember this was http://localhost/articles/nov182002/DegreesWebService.
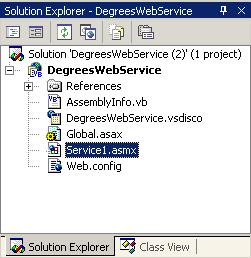
The second thing that VS does, is create some sample files in the application. The Solution Explorer window inside VS above, shows all the files that were created. We can go ahead and erase the files Service1.asmx and Global.asax.
Adding a new Web Service to our Project
First thing to do is add a Web Service form to our project. We can do that by going to Project > Add Web Service.
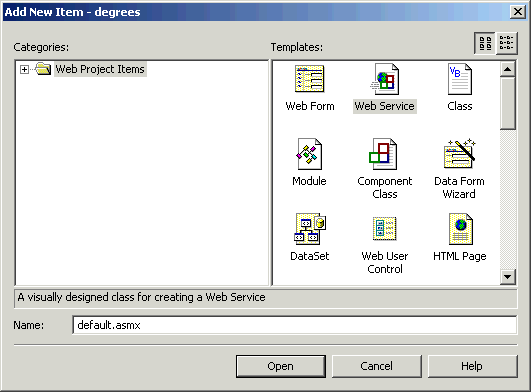
The Web Service from the Templates should already be chosen for us. We need to type a Name in the textbox, making sure we give it the extension ASMX. When we click on Open, VS actually creates 2 files by default: the default.asmx, and the codebehind file default.asmx.vb. Let’s take a look at each of the files created by VS.
The default.asmx file has only one line of code as shown above. It simply declares this page as a Web Service, and tells it to look in the codebehind page for the class degrees._default so that it inherits from it. The Codebehind parameter is used by Visual Studio and is not necessary to make this code work. Actually, at runtime, this page will simply ignore the Codebehind parameter and use the Class parameter instead.
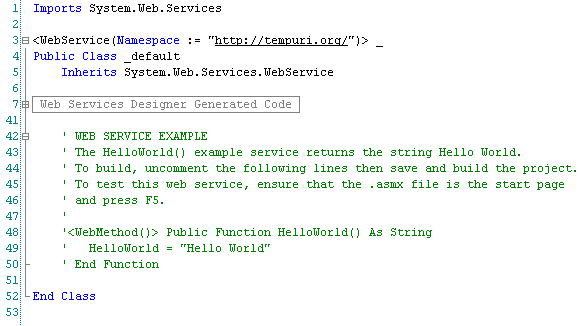
This file is not very much different from a regular web form (aspx page). A new class is created and any code should go inside this class. There are however, 4 characteristics that make this page a Web Service:
- The “Imports System.Web.Services” brings in the functionality needed under this class.
- The “<WebService(Namespace := “http://tempuri.org/”)> _” makes this class callable from the web.
- The class contains the line “Inherits System.Web.Services.WebService“, which makes this class inherit all the methods and properties of this class.
- The “<WebMethod()>” in front of a method makes this callable from the web. If it’s not there in one of the functions, we will not be able to use it in our Web Service, even if the whole class is made available through the <WebService> statement (as in no. 2).
Creating a custom method inside the Web Service
At this point, let’s create our custom method, that will change Fahrenheit degrees into Celcius. Since this method is going to output a single numeric value, let’s make it a function instead. Let’s first look at the final source code – default.asmx.vb.
What did we do here? The Option Explicit and Option Strict have been turned on to make Debugging and Error Handling better with Visual Basic. Then we got rid of the default Namespace (http://tempuri.org/) inside the WebService brackets, and replaced it with our own. We can type anything we want here really, and it will work fine.
Notice that everything inside the class was deleted, and replaced with our custom FahrenheitToCelcius function. The function itself is a very simple one. It accepts a single parameter, strFahrenheit, in the form of a String, converts it first to a Decimal so we can work with it, changes it to Celcius with our formula, rounds it to 2 decimal places, changes it back to a String, and finally returns it. The function is preceded by the <WebMethod> statement once again, which makes this function callable from the web.
Building and testing the Web Service
Let’s build and test our Web Service. We have to make sure that our starting page for the project is the default.asmx page: we right-click on the filename in the VS Solution Explorer, and select “Set As Start Page” from the pull down menu. Then go to Debug > Start, or press F5. VS builds the project and pops up a web browser window with this file. It should be noted here that a Web Service is not usually used to serve a web browser directly. This is simply a medium that Microsoft has provided so that we can test our Web Service.
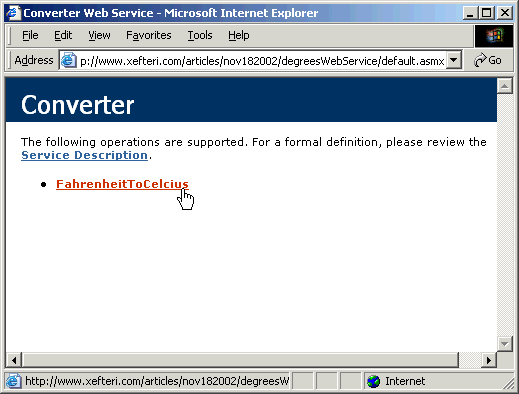
The nice thing about using VS is that it does a lot of the work behind the scenes. From the screen capture above, we see that first of all we have a listing of the operations that have been web-enabled. As we have seen earlier, these are the ones that have the <WebMethod> in front of them. We also have a link to the Service Description. This is the Web Service Description Language (WSDL), which is the XML grammar for describing Web Services. This is a Microsoft co-submitted W3C specification. This description includes everything we need to know about our Web Service, such as where to find it, what properties and methods are supported, the data types, and the protocols used to communicate with it. We can use this WSDL file to build proxies that clients can use to communicate with our Web Service. We’ll see how to do that later on.
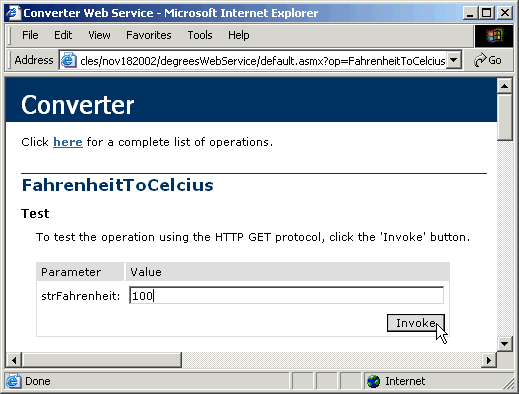
Clicking on the link provided for our function, takes us to another screen, where .NET provides a nice interface for us to test our Web Service through the HTTP GET protocol. We enter a value in the textbox provided (100 in this case), and press the Invoke button.

This opens up another window, where the result is returned to us in an XML file. In this case, 37.78 is the equivalent of 100 Fahrenheit in Celcius. It is returned as a string, rounded to 2 decimal places, just like our function should behave. This XML file is a simple one, having only one node, which has an attribute xmlns set equal to the value of our <WebService> Namespace. Since we are using the HTTP GET protocol to test this service, we can change the URL directly, replacing the value of strFahrenheit from 100 to something else and we will get our new response.
So now our Web Service is ready. Anyone with a browser can access it and use it.
Adding the Web Service as a Reference to a Project
To use, or consume, our Web Service, we must first make a Web reference to the WSDL file that was created by VS. Go to Project > Add Web Reference.
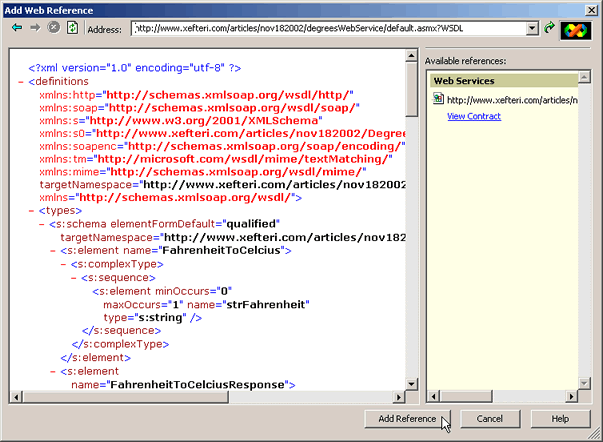
In the dialog box that comes up, type in the complete URL of the Service Description of the Web Service, or the WSDL file. In our case, this file’s URL is http://www.xefteri.com/articles/nov182002/DegreesWebService/default.asmx?WSDL. VS will fetch the WSDL file, and if everything is fine, it will display it on the left, and enable the Add Reference button at the bottom, so we can add it to our Project. Click on the button to do so.
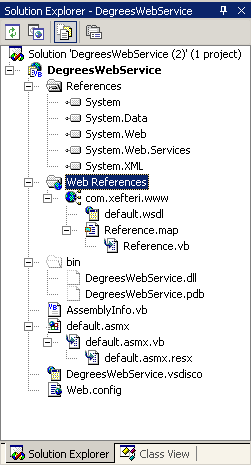
The refreshed Solution Explorer now shows the addition of the Web Service as a Web Reference. It’s given the name com.xefteri.com, and that is going to be our Namespace as we call its methods and properties, as we will see later on. We can simply rename this to whatever we want, and it will propagate to the examples below.
By adding the Web Reference, VS has connected to the Web Service, parsed the WSDL, and generated a proxy class which we can use to program with. A proxy is some code that does work on behalf of other code. The proxy looks and feels the same as the Web Service we are calling. It has the same methods and properties, but it it does not contain the actual implementation. It simply acts as a go-between our code and the Web Service, so that we don’t have to deal with the complicated details of the Web Service in XML.
Consuming the Web Service
When we use this Web Service, or any other, we typically do so within an ASPX web form. So, let’s see how to use, or consume, this Web Service we just created inside an ASPX page. We could start a new ASP.NET Web Application Project to do this, but for simplicity’s sake we’ll just add a web form to our existing Project. Go to Project > Add Web Form and name our file default.aspx. When we create our new form, VS actually creates 2 files: the first one is the default.aspx and the second is the codebehind, default.aspx.vb.
We’ll modify the default.aspx page to add a textbox, a button and a label. We’ll name them txtInput, btnConvert and lblCelcius respectively.
VS takes care of the first line of code in this file. It knows to look in the codebehind file, and when deployed to inherit from the _default class of the codebehind. Since our whole Namespace is DegreesWebService, then this class becomes DegreesWebService._default.
Let’s take a closer look at what we have done here. The codebehind is wrapped inside a class called _default, which inherits from the System.Web.UI.Page. We also have our three web controls that we use in the default.aspx page defined here so we can use them. Most important of all is the variable myWebService, which is a new class of com.xefteri.www.Converter(). This is a class that resides in our system after the addition of the Web Service as a Web Reference. It is actually an instance of our proxy class. By declaring our variable as a class of this type, we now have access to the Web Service’s methods and properties.
Our only existing Sub handles the button click, and we simply set the text of the label control equal to what is returned from our FahrenheitToCelcius function we created earlier. We make sure we pass into that function the value of the input box, and finally we set the label control visible, since it was set to invisible initially.
In this article, we have gone through how to create and consume a Web Service using Visual Studio.NET. Using Studio, this is extremely easy to do, but not necessary. We could have used instead the world’s most popular editor – Notepad, and compile our DLL with the command prompt. The .NET framework is needed though to run our creation.
Hi,
How to supply username and password to consume a wsdl file for invoking a web service??